Steps to Embed a Canvas App Page in a Model-Driven App Form
Step 1:
Go to your solution and create a Canvas App page. Refer to the image below for guidance.
Step 2:
The Canvas App page will open in Power Apps Studio.In the OnStart property of the app, add the following code:
Set(a,Param("recordId")); // Returns the record ID
Set(b,Param("entityName"));
Next, insert a Label control and set its Text property to:
"a: "&a&""&Char(10)&"
b: "&b&""&Char(10)
This will display the values of the parameters passed from the model-driven app.
Finally, give your custom page a name and publish it.
Step 3:
Add the custom page to your Model-Driven App by editing the app in the App Designer. Refer to the image below for detailed steps.
Then, select the custom page you added and uncheck the "Show in navigation" option. This ensures the page doesn't appear in the app’s left-hand navigation but can still be opened programmatically.

Step 4:
Add JavaScript code to open the custom page.To do this, navigate to your solution and go to:
New > More > Web Resource Create a new JavaScript web resource and add your code there.

In the Web Resource form:
Paste your JavaScript code into the text editor.
Set the File Type to JavaScript (JScript).
Provide a meaningful Name (e.g:
openCustomPageOnLoad)Enter a Display Name (e.g:
Open Custom Page OnLoad).
Then save and publish the web resource.

Add the following JavaScript code to the web resource, then save and publish it:
function openCustomPageOnLoad(executionContext) {
var formContext = executionContext.getFormContext();
// Get record ID and entity name
var Id = formContext.data.entity.getId(); // Includes curly braces
console.log(Id);
var entityName = formContext.data.entity.getEntityName();
console.log(entityName);
// Strip the curly braces from the record ID
Id = Id.replace("{", "").replace(/[{}]/g, "");
console.log(Id);
// Prepare parameters to send to the custom page
var pageInput = {
pageType: "custom",
name: "sun_pageonload_15405", // <-- Use the name of the custom page
entityName: entityName,
recordId: Id,
// Optional: pass additional parameters
};
var navigationOptions = {
target: 2, // Open in dialog
width: { value: 70, unit: "%" },
height: { value: 70, unit: "%" },
position: 1 // Center
};
Xrm.Navigation.navigateTo(pageInput, navigationOptions).then(
function () {
console.log("Custom page opened.");
},
function (error) {
console.error("Failed to open custom page:", error.message);
}
);
}
For the
"name" property, make sure to use the custom page's full logical name, which includes the app's publisher prefix, e.g:
new_custom.custompagename.
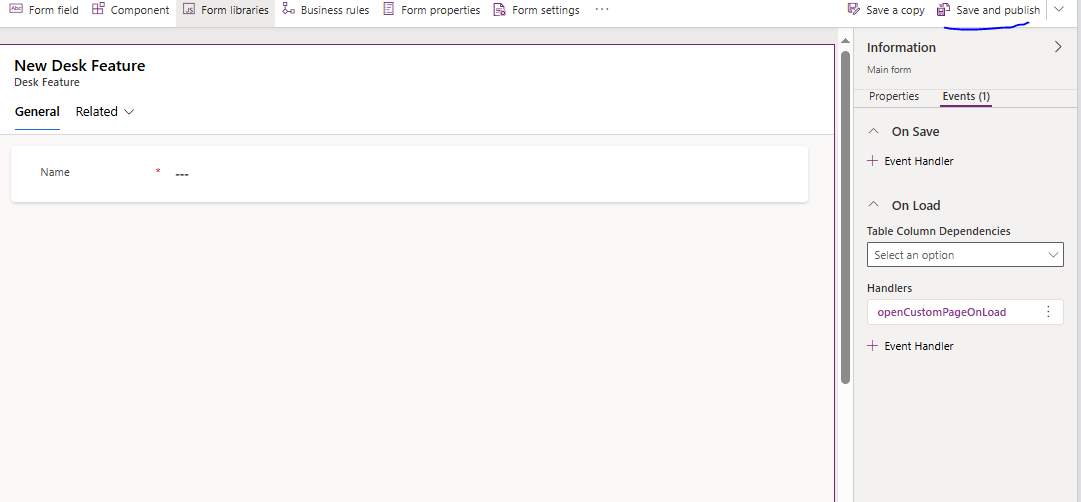
Step 5:
Attach the JavaScript function to a form event in the Model-Driven App.In this example, we'll attach it to the form's OnLoad event.
To do this:
Open your table in the solution.
Go to the Forms section and open the Main Form in the form editor.

Click on main form


Select our web resource.


Now open model driven app and click on the record.

Now, when the form loads, the Canvas page will automatically open.

That's it! You've successfully created and integrated a custom page into your Model-Driven App.


🙌
ReplyDelete