Step-by-Step: Give Unique Permissions to OneDrive Files Using Power Automate and Graph API (No Premium License Needed)
We are uploading files through Power Apps using the Attachment control. In the backend, a Power Automate flow uploads these files to OneDrive and assigns unique permissions.
Since Power Automate does not have a built-in connector to directly assign unique permissions in OneDrive, we are handling this through the Microsoft Graph API (without using a custom connector).
Step 1: Create a Blank Power Apps Application
-
Open Power Apps Studio.
-
Select New app > Start with a page design as shown below.

Step 2: select Blank Canvas

Step 3: Add an Attachment Control
In Power Apps, the Attachment control is not available directly from the standard controls list.
To get the Attachment control:
-
Add an Edit Form to your app.
-
Connect the form to a SharePoint list.
-
Once connected, the form will automatically include the Attachments field.
You can then use this Attachment control to upload files.

Step 4: Keep Only the Attachment Control
Since we only need the Attachment control:
-
Select the Attachments field inside the form.
-
Press Ctrl + X to cut it.
-
Delete the form.
-
Then press Ctrl + V to paste the Attachment control directly onto the screen.
This way, you have only the Attachment control without the form.

Step 5: Add a Combo Box to Select Users
We are assigning permissions to users based on the selection from a Combo Box.
-
Add a Combo Box control to the screen.
-
Add the Office365Users data source to your app.
-
Set the Items property of the Combo Box as shown below:
This configuration will allow you to search and select users from your organization's directory.

After adding the Combo Box:
-
Click on the Combo Box.
-
Select Edit fields.
-
Modify the structure (Display fields, etc.) as shown in the image above.
Step 6: Create a Power Automate Flow
-
Open Power Automate.
-
Create a new flow with the trigger "When Power Apps calls a Flow (V2)".
-
Then click Create.
This flow will handle uploading the file to OneDrive and assigning unique permissions.

Step 7: Add emails[Text] and File Content[File] input to the trigger.

Step 8: Create a Permission Array Variable
Next, create an Array variable.
This variable will store the email addresses of the users to whom we will assign unique permissions.
-
Add a "Initialize variable" action.
-
Set the Name to something like var
PermissionArray. -
Set the Type to Array.
-
Initially, leave the Value empty (we will populate it later).

Insert the "Apply to each" action.
-
In the "Value" field, add the following expression to split the string of email addresses into an array:
split(triggerBody()?['text'], ';')

Step 10: Append Each Item to the Permission Array
-
Inside the "Apply to each" action, use the "Append to array variable" action.
-
Set the Name of the array variable to
PermissionArray. -
In the Value field, use the following expression to append the current item: item()


Step 11: Add "Create File" Action in OneDrive
-
Add the "Create file" action for OneDrive.
-
In the Folder Path field, specify the location where you want to create the file.
-
In the File Name field, add the following expression to use the name of the uploaded file: triggerBody()['file']['name']
For File Content, select File Content from the dynamic properties.
This will create the file in the specified folder with the correct name and content.

Step 12: Get Folder Path Dynamically
In this step, we need the Folder Path. For my scenario, the path is /Graph API. To retrieve this dynamically, I used the following expression: substring(outputs('Create_file')?['body/Path'], 0, lastIndexOf(outputs('Create_file')?['body/Path'], '/'))

Step 13: Get ETag for Unique File ID
To assign unique permissions, we need the ETag of the file, which serves as a unique identifier for the file.
-
The ETag is available dynamically from the "Create file" action.
-
You can access it from the output of the Create file action.

Step 14: To extract the file unique id use the following expression:

Step 15: Add a Compose Action for Permission Array
-
Add a "Compose" action.
-
In the Inputs field of the Compose action, add the
varPermissionArrayvariable.
This will allow you to see and work with the array of email addresses that you've gathered for unique permission assignments.

Step 16: Add "Send an HTTP Request" Action from the Office 365 Users Connector
-
Add the "Send an HTTP request" action using the Office 365 Users connector.
-
When adding the Permission Array to the body of the request, it won't show directly. To include the array, use the following expression instead: variables('varPermissionArray')
If you hover over the Step 14 Compose value, this expression will display.
-
Once this is set, you can delete the Compose 2 action (if not needed). Keeping unnecessary actions in the flow can affect its performance, so it’s best practice to remove them.

URI will be :https://graph.microsoft.com/v1.0/me/drive/items/{compose Unique id of the file}/invite
Method: POST
Body: {
"recipients": Variable('varPermissionArray'), "message": "Here's the file that we're collaborating on.", "requireSignIn": true, "sendInvitation": false, "roles": [ "write" ] }Content-Type: application/json

Step 17: Add the Flow to Power Apps
-
First, save the flow in Power Automate.
-
Then, go to the Power Apps Editor.
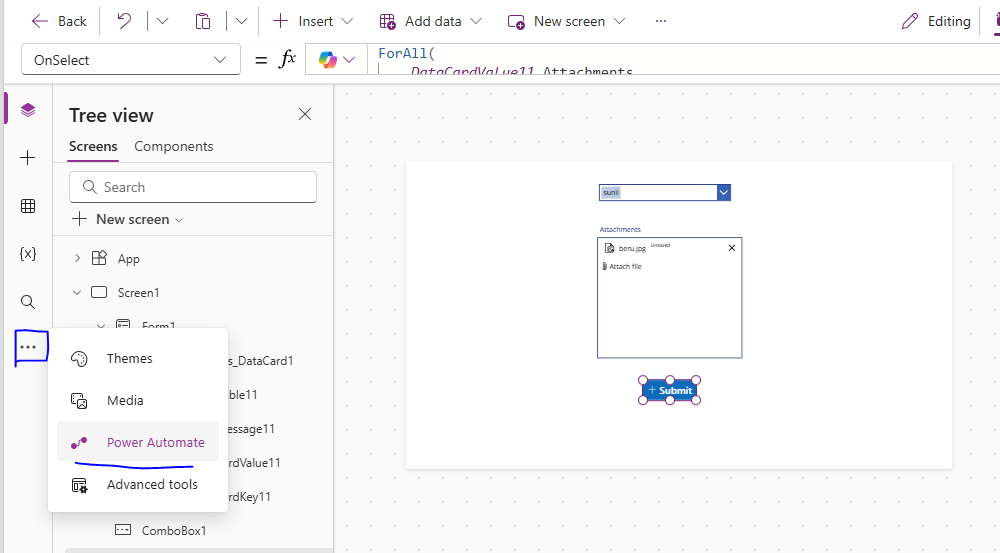
-
In the Power Apps Editor, navigate to the Power Automate section, as shown in the image below.
This will allow you to integrate the flow into your Power Apps application.
Step 18: Click on add flow and select our flow.

Step 19: Trigger the Flow on the Submit Button
To trigger the flow when the user clicks the submit button:
-
In the OnSelect property of the submit button, add the following Power FX formula:
Now, select any user from the Combo Box, add an attachment in the attachment control, and click Submit, as shown in the image below.
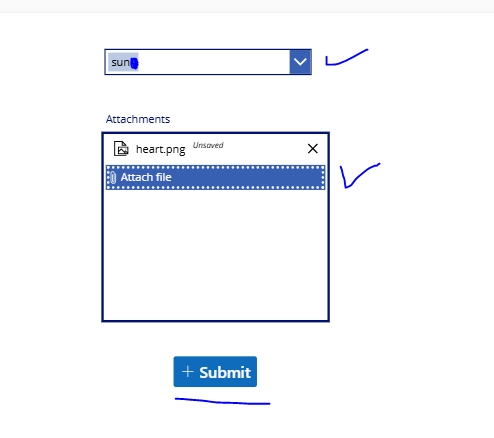
Now, when the flow runs, it will grant write permissions to the user selected in the Combo Box for the file stored in OneDrive.

I hope you found this guide helpful in integrating unique permissions for OneDrive files using Power Automate and the Graph API without needing a premium license. Power Platform offers powerful tools to automate and enhance your workflows, and I’m excited to share more tips and tricks with you. Keep following for more insights on Power Apps, Power Automate, and other exciting Power Platform ideas.


Thank you for the information.
ReplyDeleteI was searching how I can give unique permission in Onedrive.
This solved my issue.