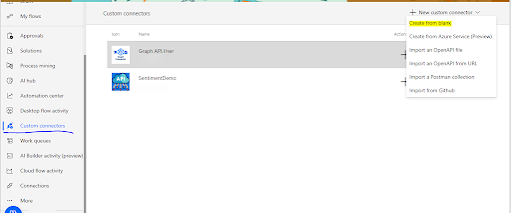
Step 1: Open Power Automate, navigate to the Custom Connectors tab, and select Create from blank as shown in the image below. custom connector(click image for better resolution) Step 2: In the General tab, upload an icon (less than 1MB), add a description, select the correct scheme (in my case, HTTPS ), and provide the host name. For example, if your API URL is https://graph.microsoft.com/v1.0/users/{email} , the host name will be the highlighted part — graph.microsoft.com . Step 3: Go to the Security tab. Here, you need to select the authentication method. Choose OAuth 2.0 as the authentication type, as shown in the image below. Step 4: Select the Identity Provider as Azure Active Directory . Check the box Enable Service Principal Support . This option allows you to create a connection using a Client ID and Client Secret instead of using the user's own authentication. Next, provide the Client ID , Client Secret , Tenant ID , and other required details as shown in t...


Comments
Post a Comment